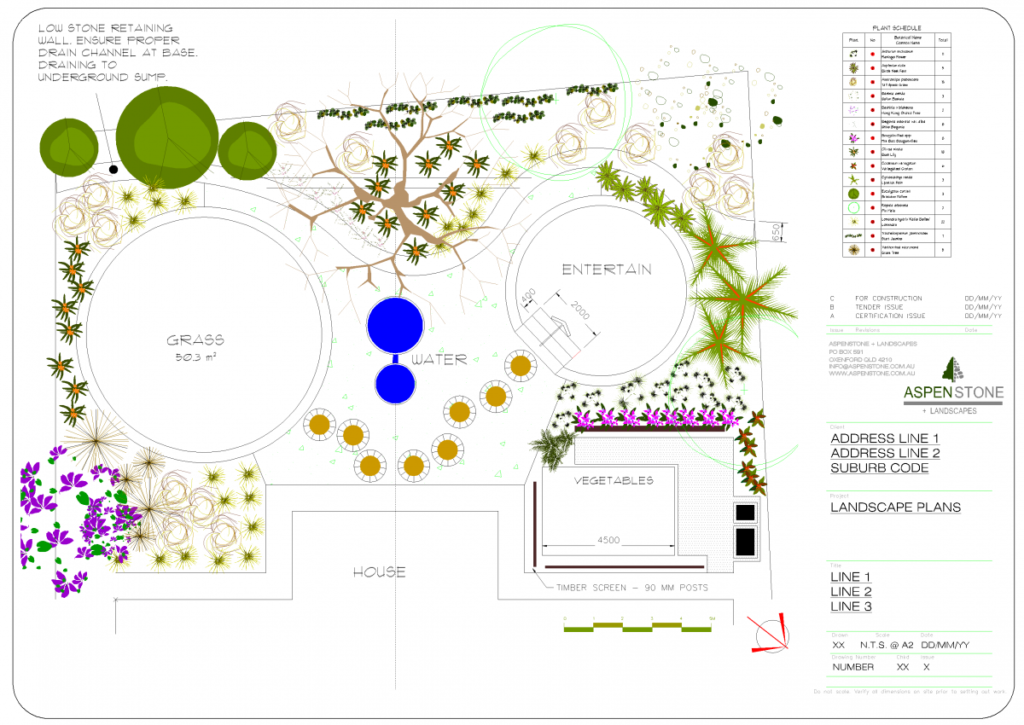
The series of YouTube movies found here aims to teach the use of gCADPlus landscape design software on a real job, through a series of ‘how to’ movies. The lessons conclude with the printing of the professional landscape CAD plan shown below.

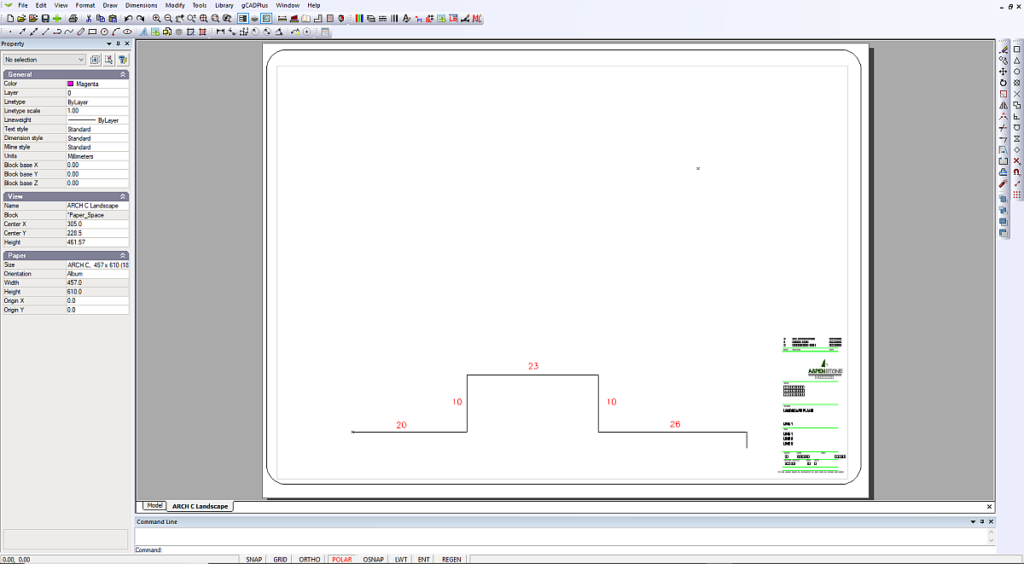
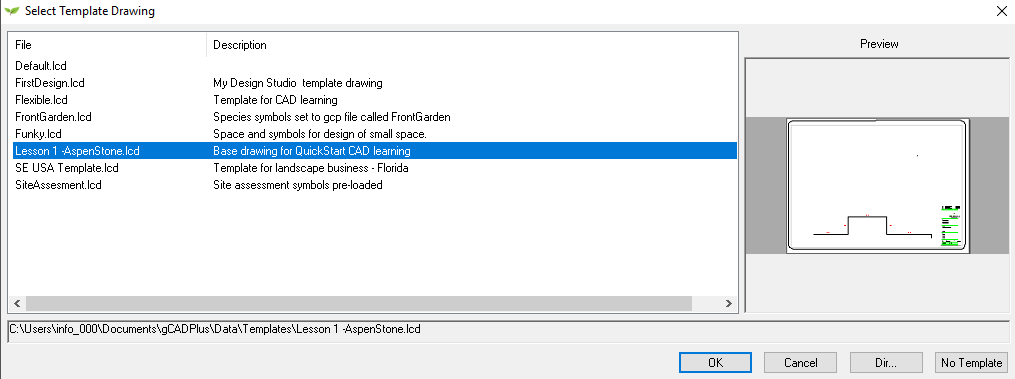
Lesson 1: We will assume that you have visited the site that’s ready to be landscaped and have made a simple ‘mud map’ with dimensions of important features including the footprint of the house. The first step is to plot the footprint of a house. So if you have not already done so, start gCADPlus and use File > New and select the template Lesson 1 -AspenStone.

![]() Here is a movie covering lesson 1: The movie begins by suggesting that you load the file “Lesson 1 -AspenStone”. There is no need to do that as it can simply be loaded by selecting from a list of templates as shown below.
Here is a movie covering lesson 1: The movie begins by suggesting that you load the file “Lesson 1 -AspenStone”. There is no need to do that as it can simply be loaded by selecting from a list of templates as shown below.

Tip: When drawing the footprint of the house, the ‘mud map’ distances used are 20 feet (Angle zero), 10 feet (angle 90), 23 feet (angle 0), 10 feet (angle 270), 26 feet (angle 0) and an arbitrary length for the last segment.
Save the completed drawing as you will need it for Lesson 2.
Tip: When entering values 0,0 for the first point, do not try and type in the command area at the bottom of the screen. Just click in the black screen, type zero from the top row of the keyboard, a comma, a zero and hit enter. Then pull away to the right. You should see the line drawn in red.
Tip: Although you may see dimensions in the movie, you see that we erase those. We will leave a discussion of applying dimensions till later.
If you would like some feedback after you have completed this first task, save your drawing and send a copy of it as an attachment to an email to info@designcad.com.au. Please tell us something about you and your learning experience while carrying out this exercise.
Lesson 2: Locate the position of an existing tree.
Here is a movie covering lesson 2: We set the position of an existing tree. The required length of the construction line is 34.5 feet from the house footprint.
Lesson 3: Retaining wall
Set out the position of a retaining wall across the back boundary of a site. We use 1.5 feet (1′ 6″) for the width of the retaining wall.