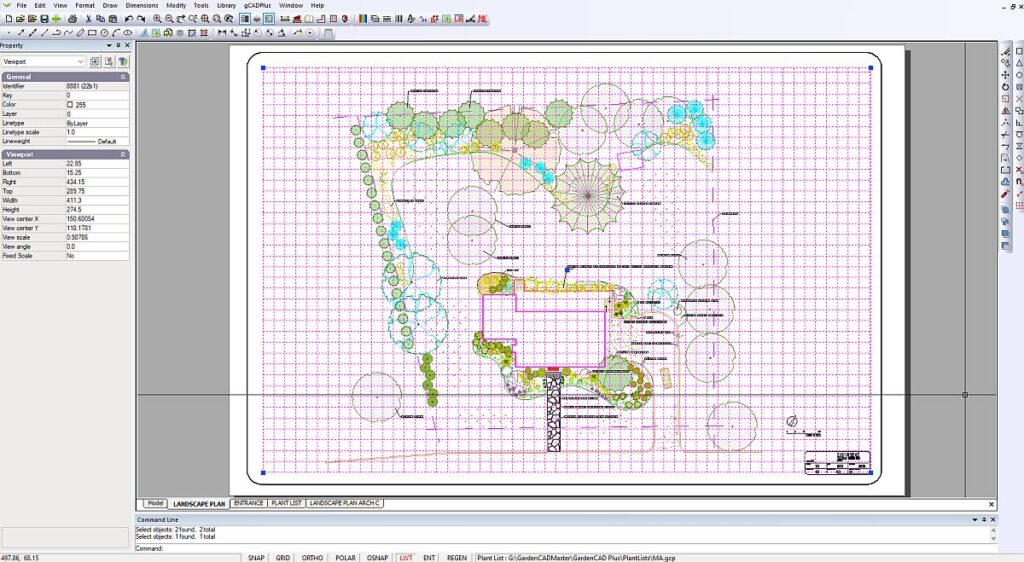
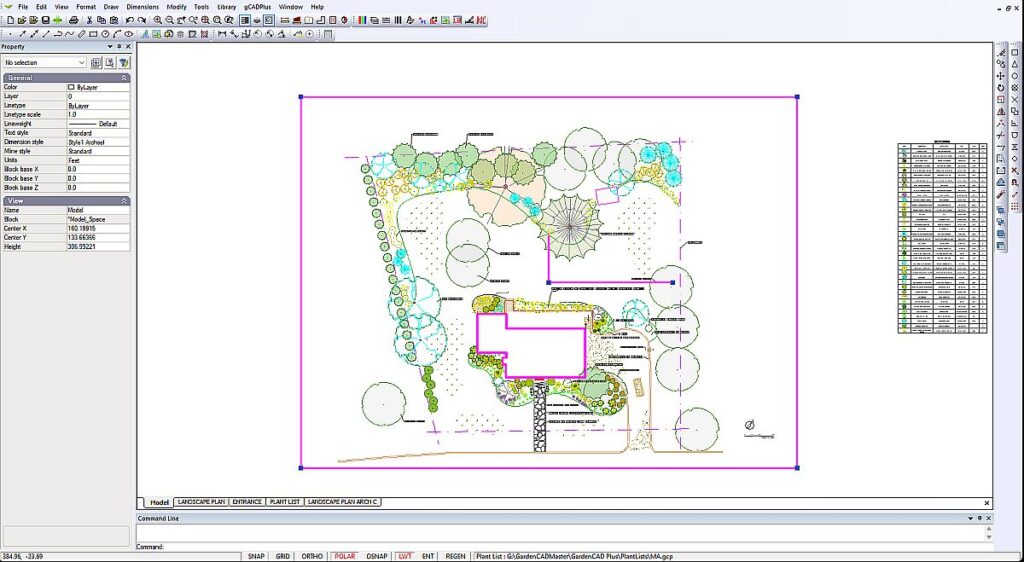
When a layout is first created, it is likely that the desired view of the design will not show in the new layout. The content of a floating viewport will need some adjsutment.
Three steps are needed in order to adjust what is seen in a floating viewport.
Step 1. Size and position the actual viewport (in layout space) on the page to its desired place,

then,
Step 2. Double-click in the middle of the (newly created and positioned) floating viewport. gCADPlus will switch automatically back to modelspace. A magenta-colored rectangle will show on the background of the modelspace. Size the view using the handles (grips) on corners and move it (using the handle in the center of the view).

Tip: Make sure that you cover the part of the drawing you want to display.
Step 3. When the correct view is in position, right-click and select “Display on layout space”.
Tip. When you return to the layout sheet, note the rectangle with the dotted line. This shows the position of the floating viewport on the paper. One final step is required to set the layout properly. Right-click and select ‘deactivate the viewport‘. It is possible to rotate the magenta viewport frame in modelspace, but that’s not recommended.
Tip: If you need to rotate a frame, it is recommended that this be done before any text is applied, otherwise the text will also be rotated
How to manage modelspace views on layout sheets: A primer
![]() This movie is in response to a user question: ‘How do you get rid of the pink rectangle after you have gone to a floating viewport on a layout page and double-clicked in your layout? The pink rectangle box appears and I can’t make any more changes to the drawing.’ We show that the box outlined in pink/magenta shows what will be shown on a floating viewport in the layout. It is possible to move, the box, change its size, and even rotate it, but unlike the case in AutoCAD, you cannot edit the design at this point. To do that, it is necessary to return to the layout space. That’s done by right-clicking and selecting ‘Display on Layout’. There is one final step required before the design can be edited, it is necessary to deactivate the viewport before it is possible to switch back to modelspace. That’s done by selecting the modelspace tab at the bottom of the screen.
This movie is in response to a user question: ‘How do you get rid of the pink rectangle after you have gone to a floating viewport on a layout page and double-clicked in your layout? The pink rectangle box appears and I can’t make any more changes to the drawing.’ We show that the box outlined in pink/magenta shows what will be shown on a floating viewport in the layout. It is possible to move, the box, change its size, and even rotate it, but unlike the case in AutoCAD, you cannot edit the design at this point. To do that, it is necessary to return to the layout space. That’s done by right-clicking and selecting ‘Display on Layout’. There is one final step required before the design can be edited, it is necessary to deactivate the viewport before it is possible to switch back to modelspace. That’s done by selecting the modelspace tab at the bottom of the screen.
Tip: A floating viewport occupying most of the page is usually created automatically. If the floating viewport does not show, right-click on the layout tab name and select create a new viewport.