Start Google Earth and ‘fly’ to the location.
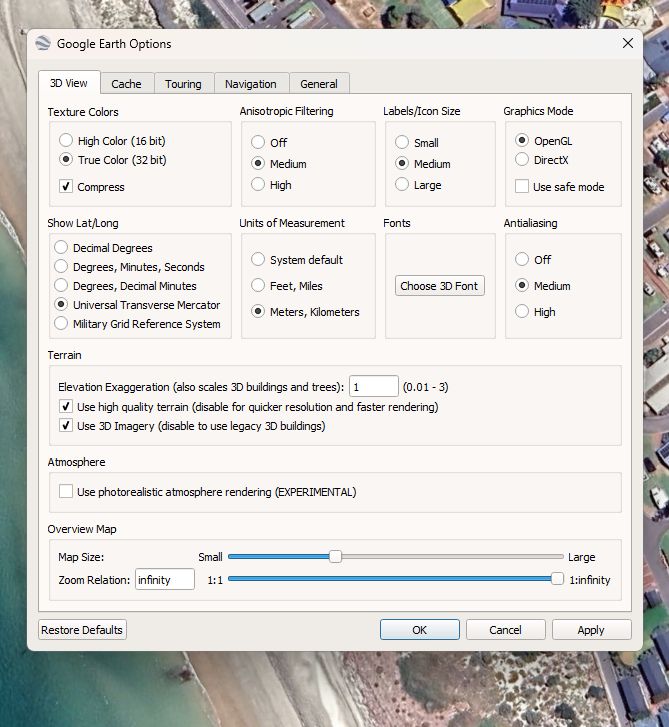
Google Earth displays the pointer coordinates as latitude and longitude in the interface’s lower right corner. Working in meters will be easier in the gCADPlus environment, so we need to change the settings in Google Earth. This is done via Tools > Options. Change Show Lat/Long to Universal UTM and change units of measure to meters and kilometres.

Now, as the cursor tool moves, distances are shown as meters.
Next, we must create two placemarks just outside the area of interest.
Set these positions outside your area of interest, as shown by the yellow markers below.

To georeference the image in gCADPlus later, we need to capture the northing and easting coordinates of the place markers. It is convenient to do that using Notepad.
Now that the permanent markers have been set, the next step is to capture a high-resolution image of the site location.
- Gain more screen real estate by turning off the sidebar.
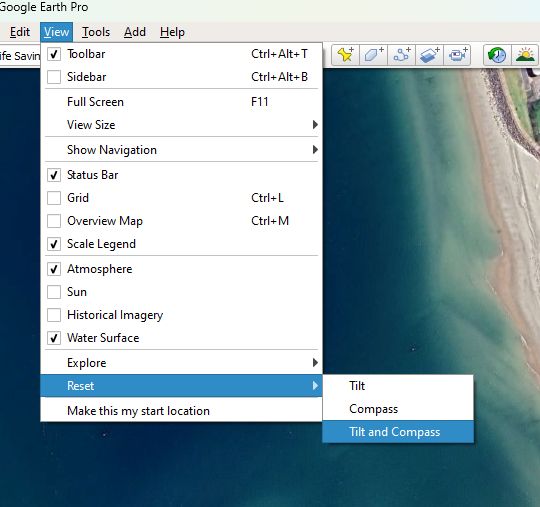
- Go to view and reset the compass to get an overhead viewpoint.

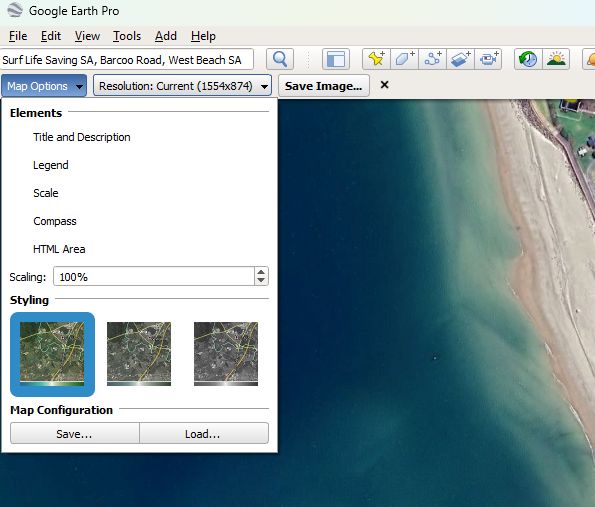
Use Map options to remove unwanted text.

Now save the image at a suitable resolution as a jpeg