|
 We are serious about not contributing to global warming and try wherever
possible to deliver our material in digital form. This has some
important advantages over printed versions of our notes.
We are serious about not contributing to global warming and try wherever
possible to deliver our material in digital form. This has some
important advantages over printed versions of our notes.
|
 |
Click
here to play a movie which shows the value of having the
PDF version of the course notes at your fingertips. |
|
Here is a link to the PDF
version of the SketchUp workbook. |
SketchUp is a computer application (software)
developed originally by a group of professionals from the architecture and
engineering disciplines. In the late 90's, they formed a company called @LastSoftware to
develop and market SketchUp. In March 2006, Google
purchased
@LastSoftware and now controls the future development of SketchUp. Of
great interest to potential users of the software is that Google have released a free (or home) version of SketchUp.
This version is suitable for learning to use the tool and can be used for
non-commercial use.
Google SketchUp is downloadable from
the Internet at http://www.sketchup.google.com
and this free version is the one that we will use in this course.
 There is also a Professional version of SketchUp.
As mentioned, we will use
the free version of SketchUp for this course. There is a great deal of
commonality between the two programs. Once you start using SketchUp
professionally, you are well advised to purchase the professional
version. We will have more to say about the features of SketchUp
Professional later. There is also a Professional version of SketchUp.
As mentioned, we will use
the free version of SketchUp for this course. There is a great deal of
commonality between the two programs. Once you start using SketchUp
professionally, you are well advised to purchase the professional
version. We will have more to say about the features of SketchUp
Professional later.
SketchUp is designed to let you create models of your
intended design in a 3-D environment. It aims to make you feel that you
are designing in much the same way as you would with pencil and paper
and so
computer modelling becomes an intuitive process.
Once a 3-D model
has been built, SketchUp contains tools which allow you to apply rendering to
surfaces in your model, create 'see though'
and hidden line views, take sections through the model, orbit around the design and create a walk
through the 'virtual' site. Because it can do all these things, the software is a tool much used by
architects and other construction and engineering professionals.
In short, SketchUp can help clients
to understand a proposed design better than they can from a 2-D plan.
The
database describing SketchUp models differs markedly from those 3-D models
created in GardenCAD, AutoCAD, IntelliCAD and MicroStation. These latter CAD tools
use a complex mix of Coons patches, ruled surfaces, surfaces of
revolution and so on to describe their 3D model. SketchUp has a much
cleaner and faster method of recording the model geometry than other CAD
tools because it uses a triangular mesh. As a result, SketchUp can be used effectively on quite modest
computer equipment.
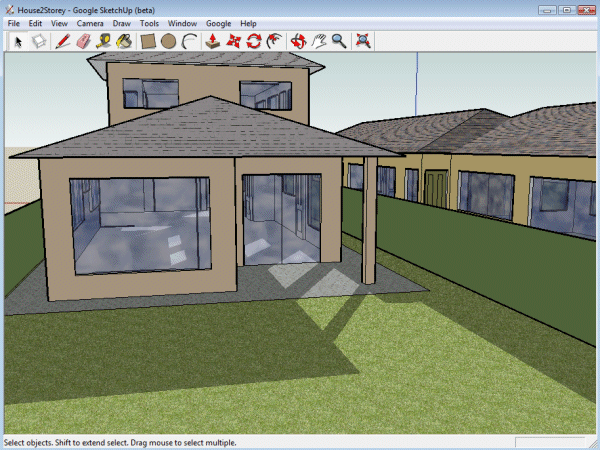
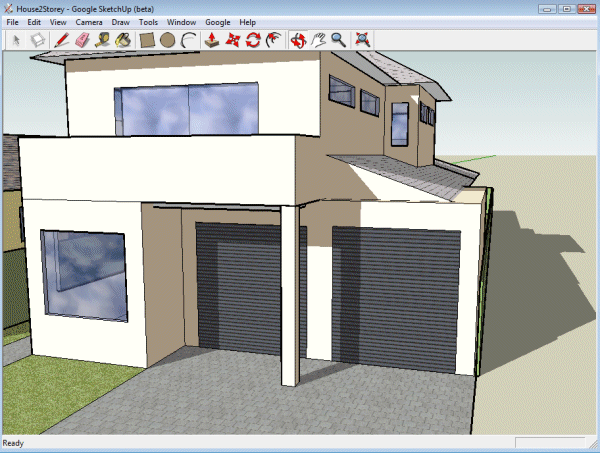
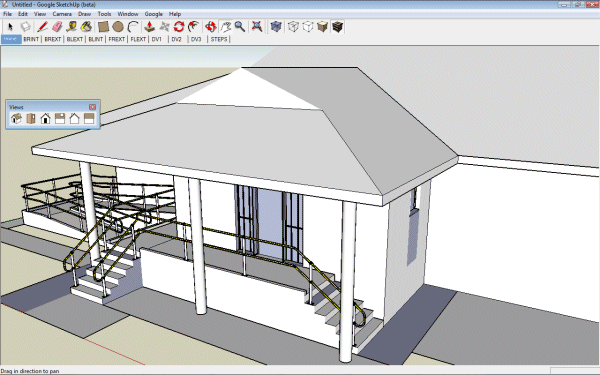
The figure below
shows two views of a typical SketchUp model, one from the rear of a
(proposed) house and one from the front. We used the orbit tool to move
around the model to obtain these two views.
 |
 |
|
A typical
SketchUp model. Rear of two story house model (top) and
front of house model below. |
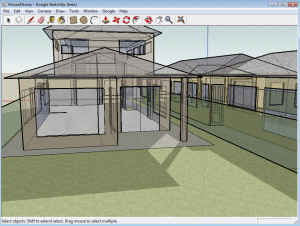
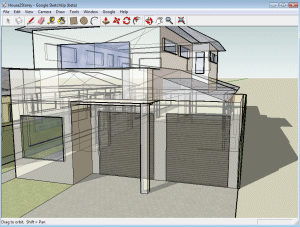
As mentioned, SketchUp provides some interesting and
quite innovative tools for visualizing the design. It
is possible to 'tell' the software to cast shadows from the model, take an X-Ray view
through the it, orbit around the model
and view it from different directions and viewpoint angles.
 |
 |
|
An X-ray view of
the rear of the house (left) and a front view (also in X-ray mode). |
|
|
Click
here to play a movie which introduces SketchUp.
We examine the model of the two story house shown in the
figures above, using the orbit tool to move around in a
virtual environment. |
Although SketchUp uses a quite different
method to describe its 3D models, the program does allow the importation of
geometry from CAD software such as AutoCAD, MicroStation or IntelliCAD. This ability
to 'talk' to other software, means
that it has gained
a considerable following among architects and engineers who can leverage
their existing work.
|
|
Click
here to play a movie which introduces
the concept that models created in software such as AutoCAD,
IntelliCAD and MicroStation can be imported into SketchUp. |
The figures
below shows SketchUp models created in their entirety in IntelliCAD and imported
into SketchUp. The model was exported as a DXF file from IntelliCAD.
 |
 |
|
A model created
entirely as a wire frame model in IntelliCAD and imported
into SketchUp. |
 |
|
Another
SketchUp model, created in IntelliCAD using solids entities
and brought into SketchUp from the process engineering field. |
Now that the development
of SketchUp is in the hands of Google, SketchUp is being used by
professionals in many different fields.
|
|
Click
here to play a movie which
show SketchUp being used in the engineering field. We show a
rectangular mesh indicating rate of air flow through a
perforated disk. |
 |
|
An engineering example - a rectangular
mesh formed by inputting data on measurement of air flow
rates through a metal plate. |
|
|
Here
is a link to another movie showing the model below in the
SketchUp environment. |
|
|
|
Another
SketchUp model, created in IntelliCAD using solids entities
and brought into SketchUp from the process engineering field. |
 |
|
Promotional coaster for NGK spark plugs. |
 |
|
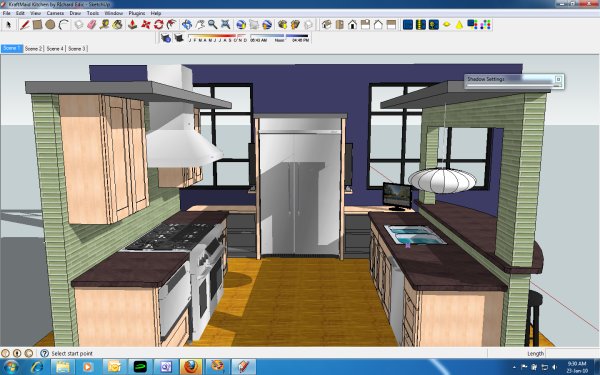
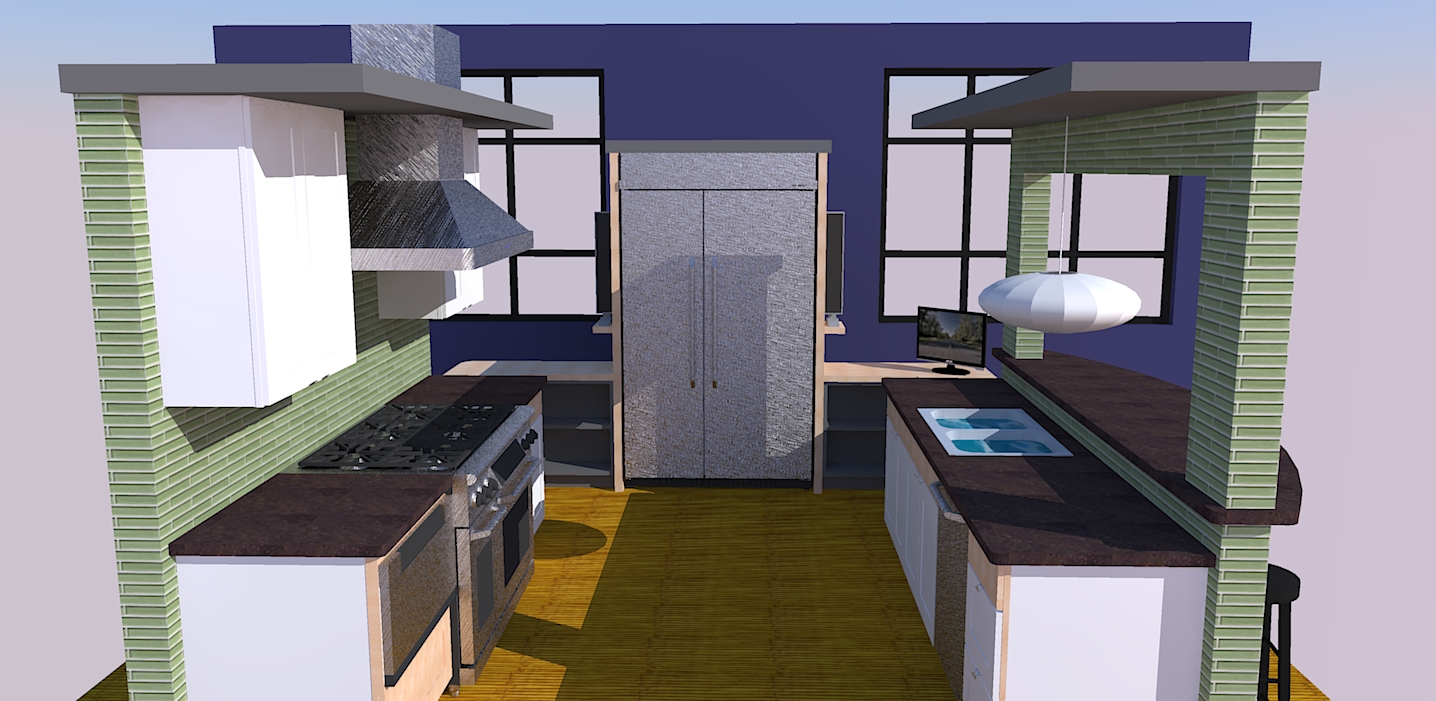
Design for a
kitchen. |
Although SketchUp
provides us with an acceptable rendering, as you will learn later, it is
possible to pass the SketchUp model to other software for improved
rendering.
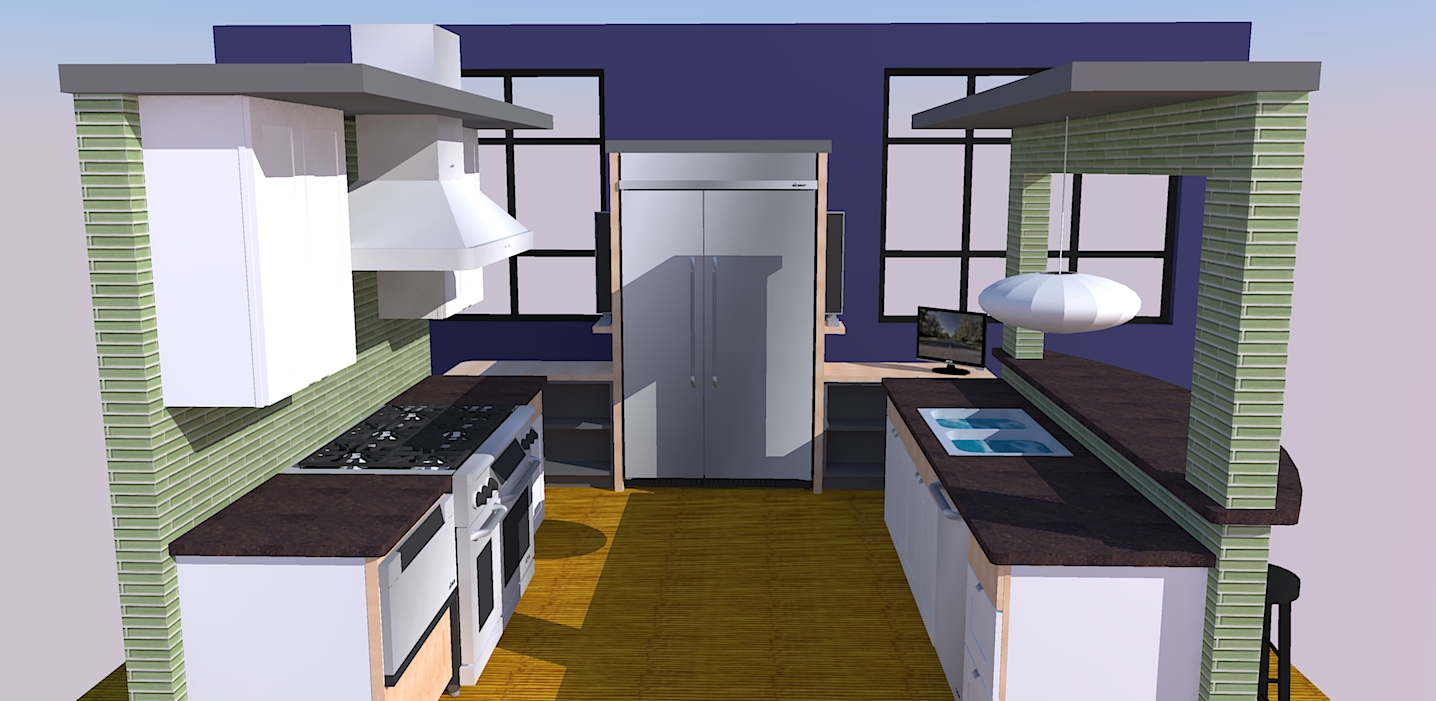 |
|
The scene above
rendered in external ray tracing software. |
 |
|
It is possible to attach different
materials to surfaces in the exported model and render
again. In the above example, we have attached brushed
aluminium to the range hood, refrigerator surface and stove.
Rendering under these conditions takes considerable time. |
That's enough by way
of introduction. We are sure that you
are anxious to try out a SketchUp yourself. We will start by getting
you to start SketchUp and load a
model which we have created. To do that, you need to download some sample files.
These will be used in the various course exercises which follow.
  Download files (click the link below)
Click on the links below to download load the sample
files needed for this module. Place the files in their own folder (we
suggest that you call it Exercises).
House2Story
House0
House1
House3
ControlRoom
Plate-3
Musical Horn
QuirkyLandscapeDesign
CStore
Train
Tree08
Terrain model
Let's take a quick look
at the program. We will examine the model of the two story house shown above.
|
|
Here
is a link to another movie showing the model below in the
SketchUp environment. |
SketchUp
- your first look at the program
Start SketchUp - click Start>Programs> and select
SketchUp.
Click File>Open.
Navigate to your newly created Exercises folder and open the file
House2Story.
As shown in the movie, experiment with the View options
first turning shadows on and off and activating the X-RAY view.
Then use the orbit tool to change your viewing position.
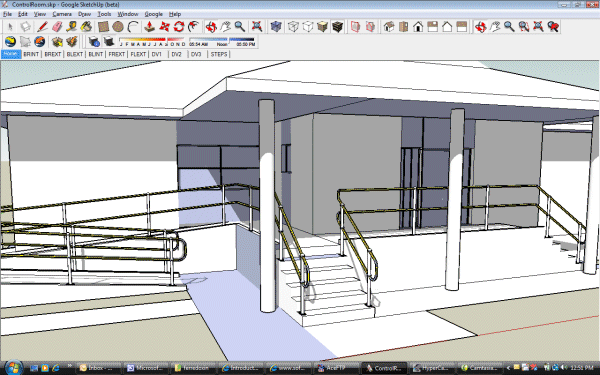
We have placed several other models House0,
House1, House3, ControlRoom in the Exercises folder for you to experiment
with. The model describing the engineering plate above is called Plate_3.
 |
 |
|
Two more models
- House0.skp and House1.skp |
Leave SketchUp running and return to your electronic
notes.
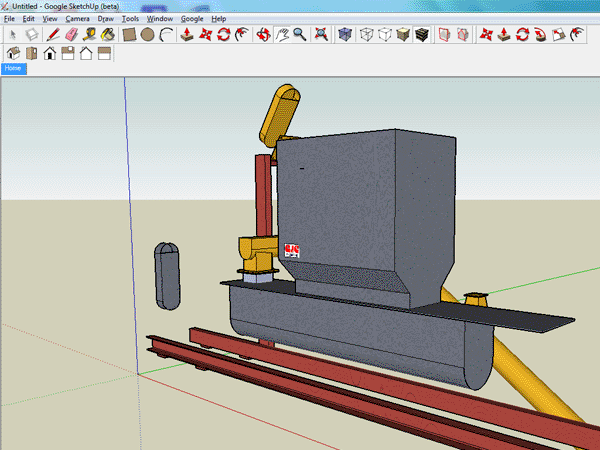
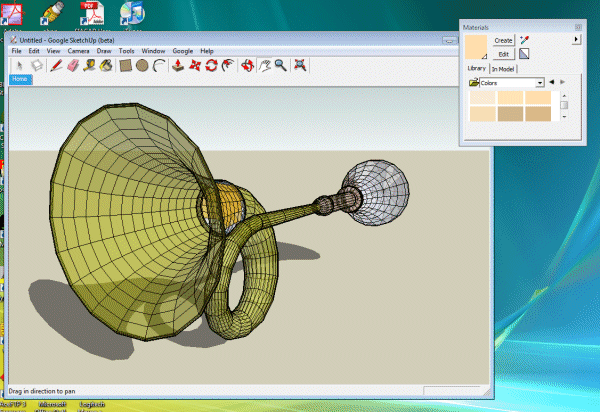
As we have mentioned, although SketchUp was
designed with building and construction industry users in mind, it can
be used in many different fields. Here is one of our models; that of a 'musical'
horn. Note that SketchUp models show wire mesh models and are similar in
view to AutoCAD/IntelliCAD and MicroStation models even though the
underlying model database is completely different.
 |
|
SketchUp model of a horn by John
McIver. Note that the window containing the Materials
palette is outside the main SketchUp window. It is important
to keep your eye on these external palettes. |
|
|
Click
here to play a movie which
shows SketchUp being used on the model above. |
SketchUp
- the 'musical' horn
Switch back to SketchUp
Click File>Open and select
the file MusicalHorn.
Experiment with the model as shown in the movie.
SketchUp can be used to create quite complex models on
modestly powered equipment. You do not need to keep upgrading your
hardware. Improving your SketchUp skills will increase productivity more
than buying new equipment!
|
|
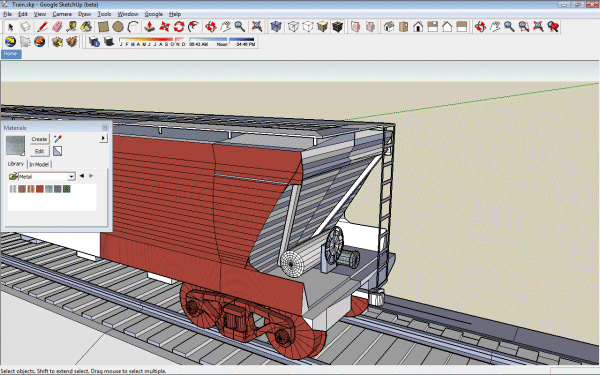
Click
here to play a movie which
shows SketchUp being used on a complex model. We show how
easy it is to attach materials to surfaces in
a model of a train carriage. |
 |
|
Model of a
railway carriage on a causeway. Model by John McIver. |
 |
|
Applying
materials to surfaces. |
SketchUp
- a mechanical engineering model
Switch back to SketchUp.
Open the file Train.
Note that we have not yet applied any materials to
surfaces in the model.
As shown in the movie, use the paint pot tool to apply some textures as shown in
the movie.
Once you have finished painting, print your model to a
PDF file, save it and send us a copy.
Leave SketchUp running and return to your electronic notes.
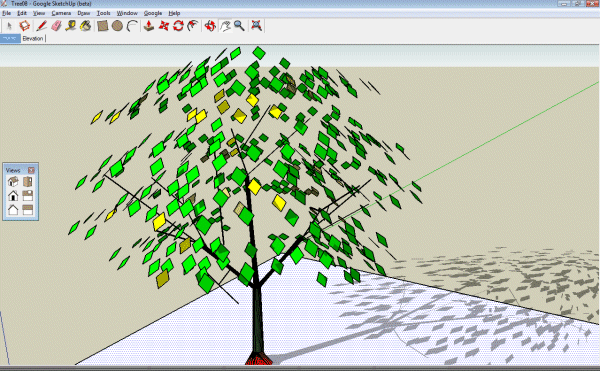
Not all objects are suitable candidates for
SketchUp modelling. While meshed and planar surfaces and
handled well by SketchUp, some objects are very difficult to properly
model. 3-D plants are in that category, although some good attempts have
been made. Note that the file size of these types of models is
necessarily very large and the result is not very realistic.
 |
|
SketchUp model
of a generic tree. The option to cast shadows has been
turned on. |
|
|
Click
here to play a movie which
shows SketchUp being used to produce a (rather unsatisfactory)
model of a 3-D tree. |
SketchUp
- a 3D tree
Switch back to SketchUp
Click File>Open and select
the file Tree08.
Experiment with the model as shown in the movie.
Leave SketchUp running and return to your electronic notes.
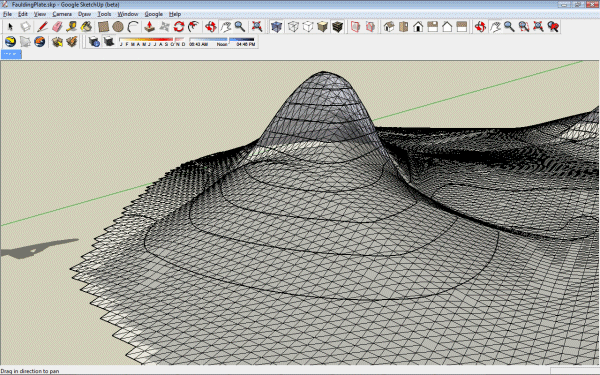
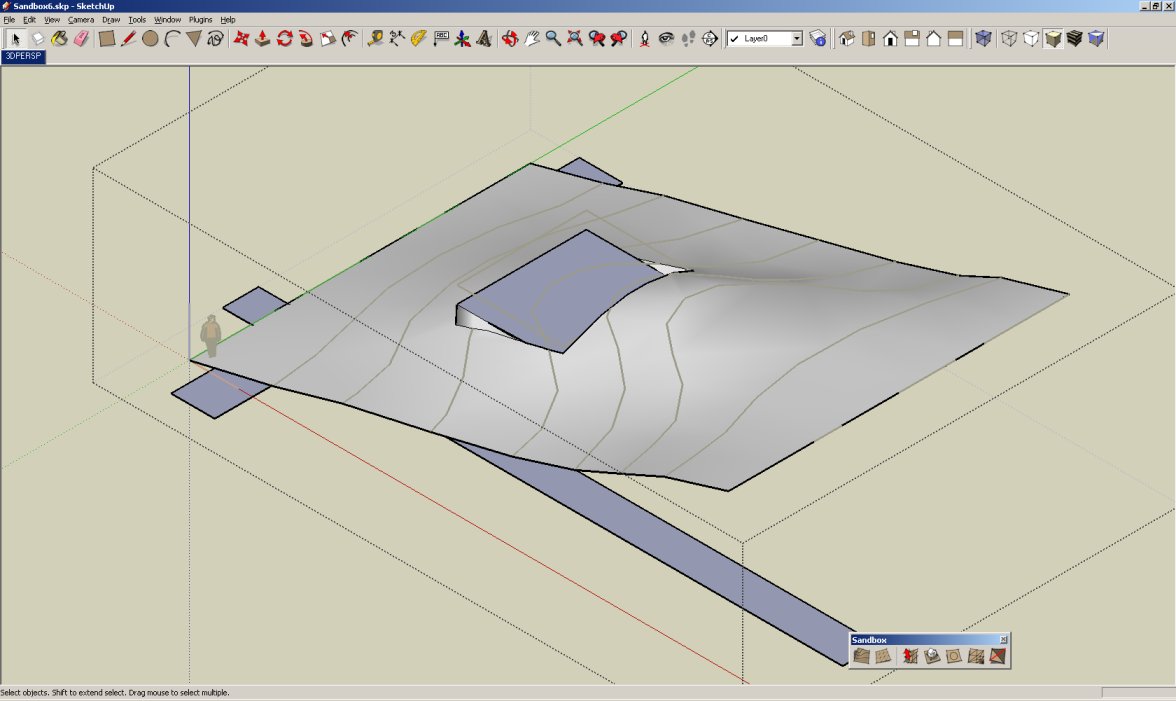
SketchUp handles terrain information much better than
many other CAD software applications. The figure below shows a
SketchUp model of a sloping site with a site for a house cut into it.
The strips running horizontally and vertically represent roads which
have been taken from the
original cadastral (flat) information. We have made a cut/fill bench in
the terrain model which is formed from a triangular mesh.
|
 |
|
Terrain model by John McIver. We have
taken some contour information into the SketchUp
environment from AutoCAD. |
SketchUp
- a terrain model
Switch back to SketchUp
Click File>Open and select
the file TerrainModel.
Leave SketchUp running and return to your electronic notes.
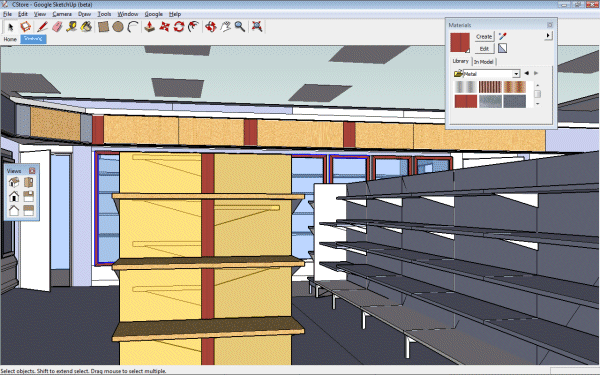
It is possible to store
views in your SketchUp models. You might like to try
using SketchUp on a more complex model, one of a retail store and the
internal layout and visit some of the views stored with the model.
 |
|
Partly rendered
image, taken from a SketchUp model of a corner store. |
|
|
Click
here to play a movie which
shows SketchUp being used to produce to model a rather more
complex
model of a retail store. |
SketchUp
- a model of a retail store
Switch back to SketchUp
Click File>Open and select
the file CStore.
Practice orbiting around the model and when you get
rather lost in space, click on the tab Shelving.
Leave SketchUp running and return to your electronic
notes.
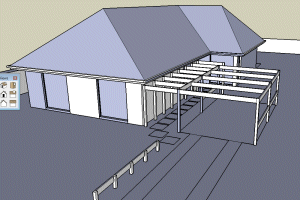
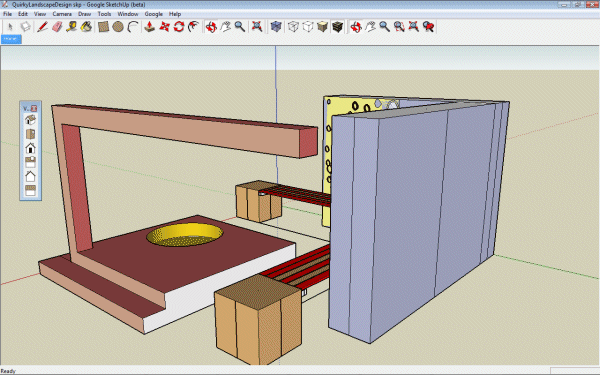
Although a powerful tool, be careful. SketchUp will allow you to create model which might be
difficult to construct.
|
|
Click
here to play a movie which
shows how one needs to take care when building models. |
 |
|
An unsupported beam in a SketchUp model. |
SketchUp
- a model of a retail store
Switch back to SketchUp
Click File>Open and select
the file QuirkyLandscapeDesign.
In this course we aim to
teach you to how to use SketchUp to create 3D models. The original mission
statement from the SketchUp developers was '3D for Everyone'.
The SketchUp programmers set out to create a piece of software which:
-
Would give designers
free reign to draw the way that they wanted to,
-
Was easy to learn,
-
Most of all was fun
to use because it enabled designers to play with their designs.
You will soon be
able to judge for yourself if they have achieved this aim. We would certainly like to hear
your views about this at the end of the course.

Please review your knowledge of the
material in this module before progressing to the next
stage. When you have done
this, please
return to the menu of modules (0r use the back button on your
browser). The next module deals in some detail with the SketchUp interface.
|